
First impressions last. Probably, it’s not fair that a fleeting, often misguiding perception can be decisive for whether to shop on a website or not. But since it plays an important role, it makes sense to customize Shopify store.
A well-designed storefront makes a customer stay on your website longer. If they do, the chances of completing a purchase grow. If the overall experience is positive, they are likely to come back. So, in the end, a nice storefront directly impacts customer loyalty and conversion rates.
If you look into future ecommerce trends, you won’t find much about design here. But it doesn’t mean customization and quality visuals aren’t necessary. On the contrary, paying enough attention to design has become something non-negotiable. So, let’s dive into Shopify theme customization and learn how to make the design work for you.
Why customize your Shopify theme?
Before you learn how to customize Shopify website, let’s recall why it is worth the effort. To prove the point, we’ve gathered a list of benefits and successful brands that benefited from theme customization.
Design affects customer trust and loyalty
How is it possible? Customizing your Shopify theme is a strategic move that goes beyond mere aesthetics. Theme customization allows you to tailor the look and feel of your online store to match your brand identity. And building a strong, memorable, and recognizable identity is a sure way to reinforce user trust.
It’s not a secret that fonts and colors can:
trigger positive or negative emotions
associate with certain moods and desires
help communicate your core values and associations visually
build connection by looking familiar or relatable.
A visually appealing storefront contributes to user experience. It’s challenging to make an emotional impact or at least attract attention if you don’t stand out using the same design many others do.
Customization also adds to consistency across communication channels. It is easier to become recognizable using a defined set of visual elements. Customization lets you adapt your online store to trends, seasonality, and customer preferences. This way, it stays relevant and responsive.
Altogether, these things create a memorable shopping experience. Positive emotions users experience while interacting with your store now get a specific visual look. They are associated with the storefront built based on your brand book. Hence, customization stops being simply a matter of taste and becomes a strategic investment in the brand’s success.
Brands that benefited from customization
The theory is good. Yet, real cases from brands that have benefited from customized themes build stronger confidence in the necessity of changes. Here are a few.
Allbirds. The company uses big images on the homepage and very detailed product pages to drive attention to their products, make shopping convenient for users, and promote sustainability through superb footwear design.

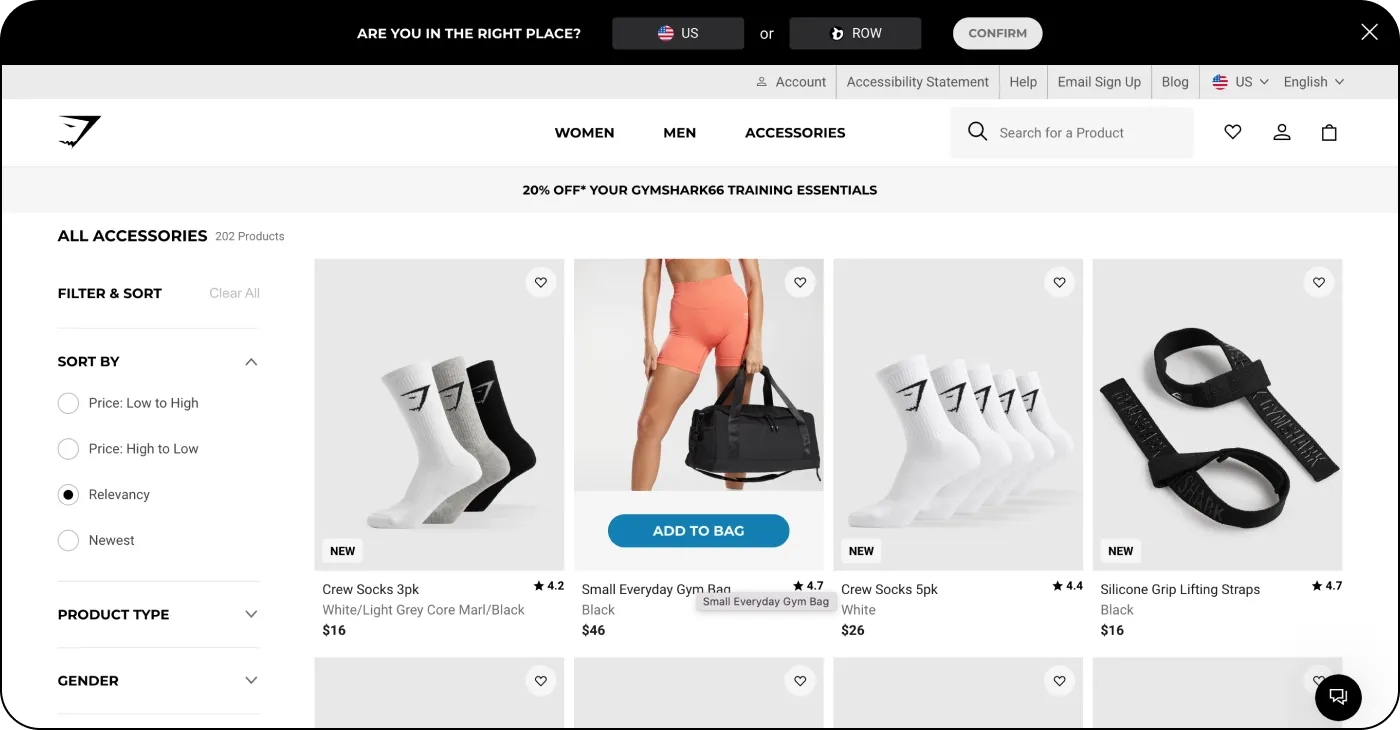
Gymshark. The company migrated its fitness apparel store from Magento and customized the theme to reflect its dynamic and energetic nature. The shop is very laconic and easy to navigate while also featuring detailed product information.
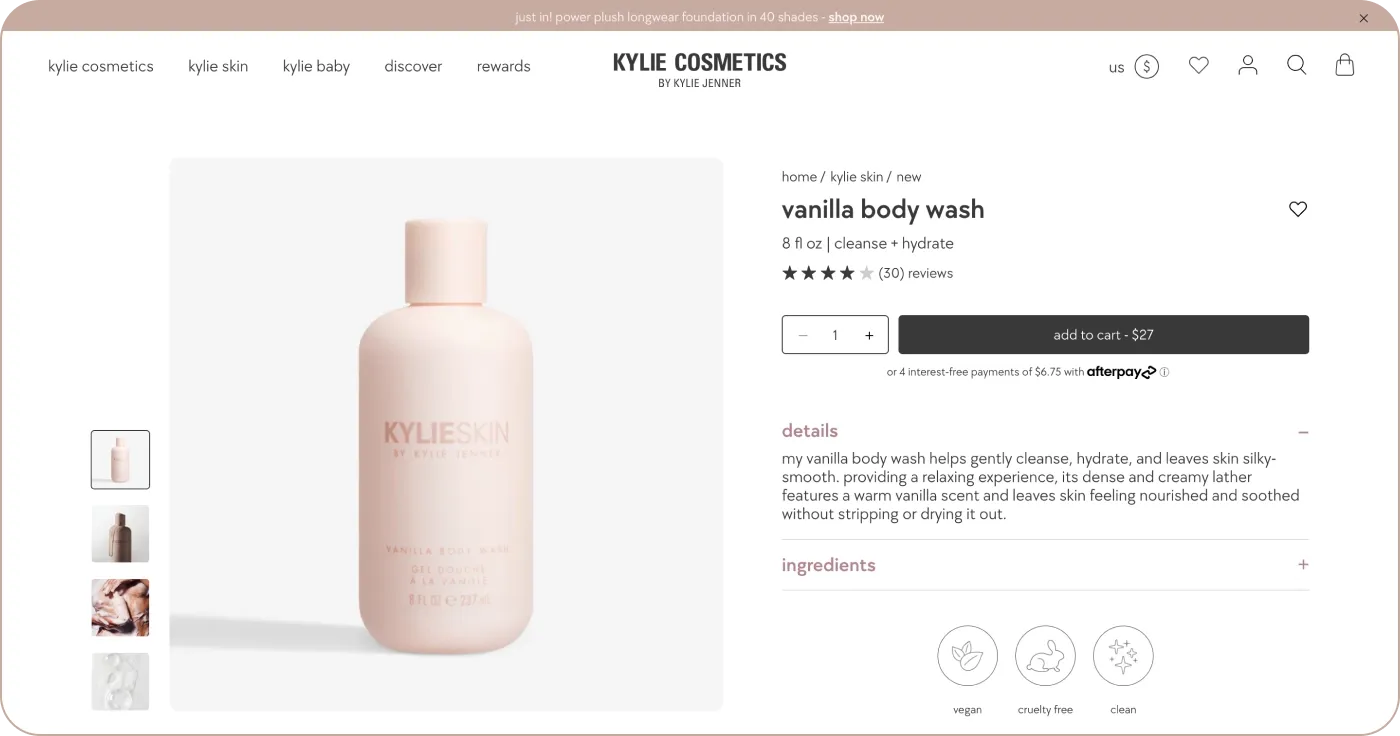
Kylie Cosmetics. The brand aims to stay relevant through regular updates on product launches, collaborations, seasonal trends, etc. You’ll find one more variation of navigation and product pages that differ in both style and structure.
Sephora Beauty, Lindt & Sprüngli Chocolate, Heinz Ketchup, and Red Bull are also Shopify’s users. Indeed, they get to offer more than just neat design. But so do you. Design is a great tool to communicate your benefits. Make them an example and learn from the best. And we’ll be sharing practical advice on how to do it.
Getting started: no coding required
So, how to edit your Shopify website? You don’t need any coding knowledge. A business owner, a content manager, a designer, a developer – basically, anyone can do it. Go to Online Store > Themes, select a theme, and click Customize to access the tools.
Theme elements you can set up without coding
What’s available in the customization section? Quite a lot, actually. You can modify and adjust everything that matters. It goes for both page structure and visual design. After you select a basic look, you can set up:
colors, fonts, and wording
change the Catalog page
add Contact Us page
add a newsletter signup
hide selected buttons
add related products section
add complementary items
add a delivery date picker
add order notes on the Cart page.
And that’s only half of the list. You can find more in the Theme Editor. Add, remove, edit, rearrange, preview, and start all over again until it all looks perfect. With such an abundance of tools, building a unique online store doesn’t sound challenging.
How to use a built-in Theme Editor
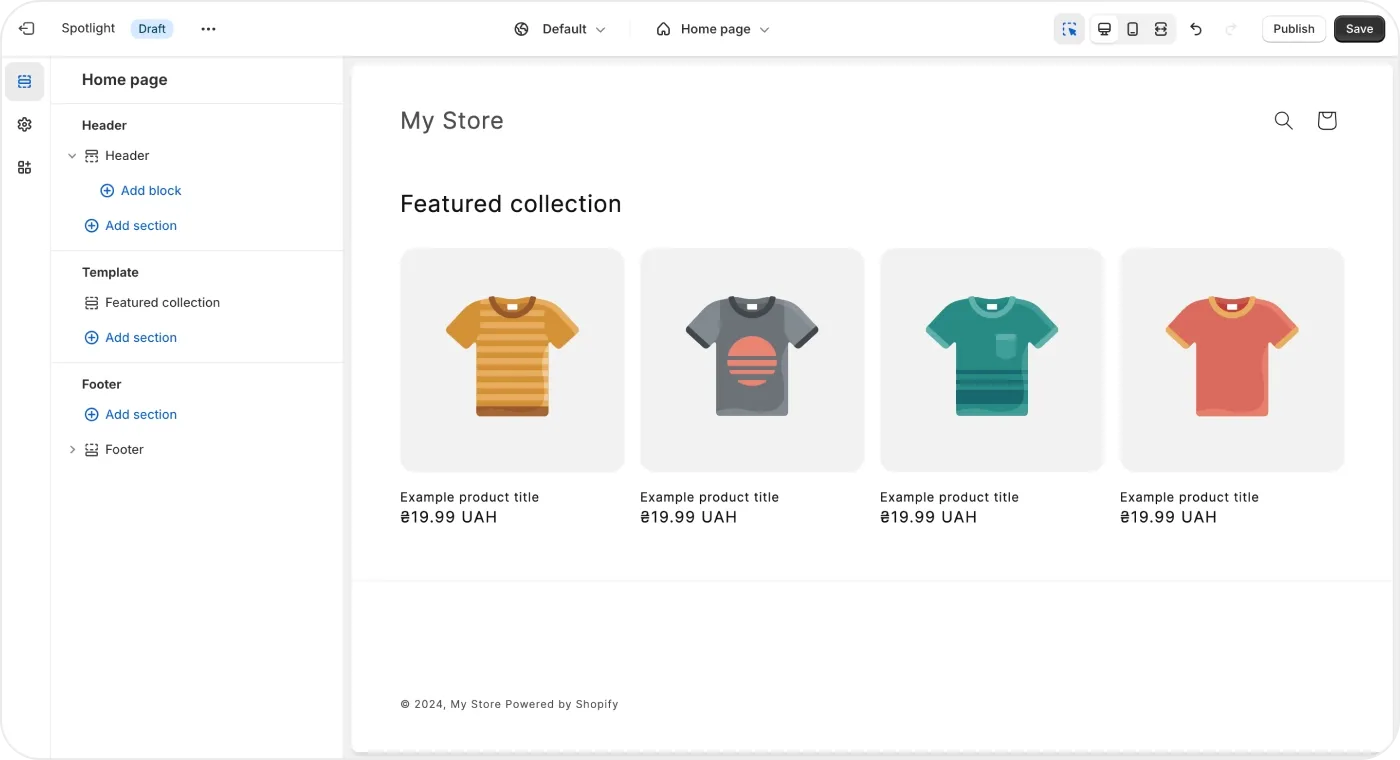
Now, a few words on how to edit Shopify theme quickly without touching any code. Use the built-in Theme Editor. Shopify is very intuitive, so you won’t find it difficult to figure it out.
- Log in to your Shopify Admin page.
- Go to the Online Store and select Themes.
- Find the theme you want to customize.
- Click the Customize button.
- Explore the theme’s sections.
- Click on a section to reveal the customization options.
- Adjust colors, fonts, and layout elements.
- Preview the changes to see how they affect your store.
- Once you are satisfied with customizations, click Save to apply the changes.
- If you made preview changes, click Publish to make them live.
The abundance of customization options is impressive. If you need assistance figuring them out, consider reaching out to DigitalSuits. Our team can guide you through the customization process. We specialize in Shopify development and will gladly share personalized advice on utilizing the Theme Editor efficiently.
Make it yours: colors, fonts, and images
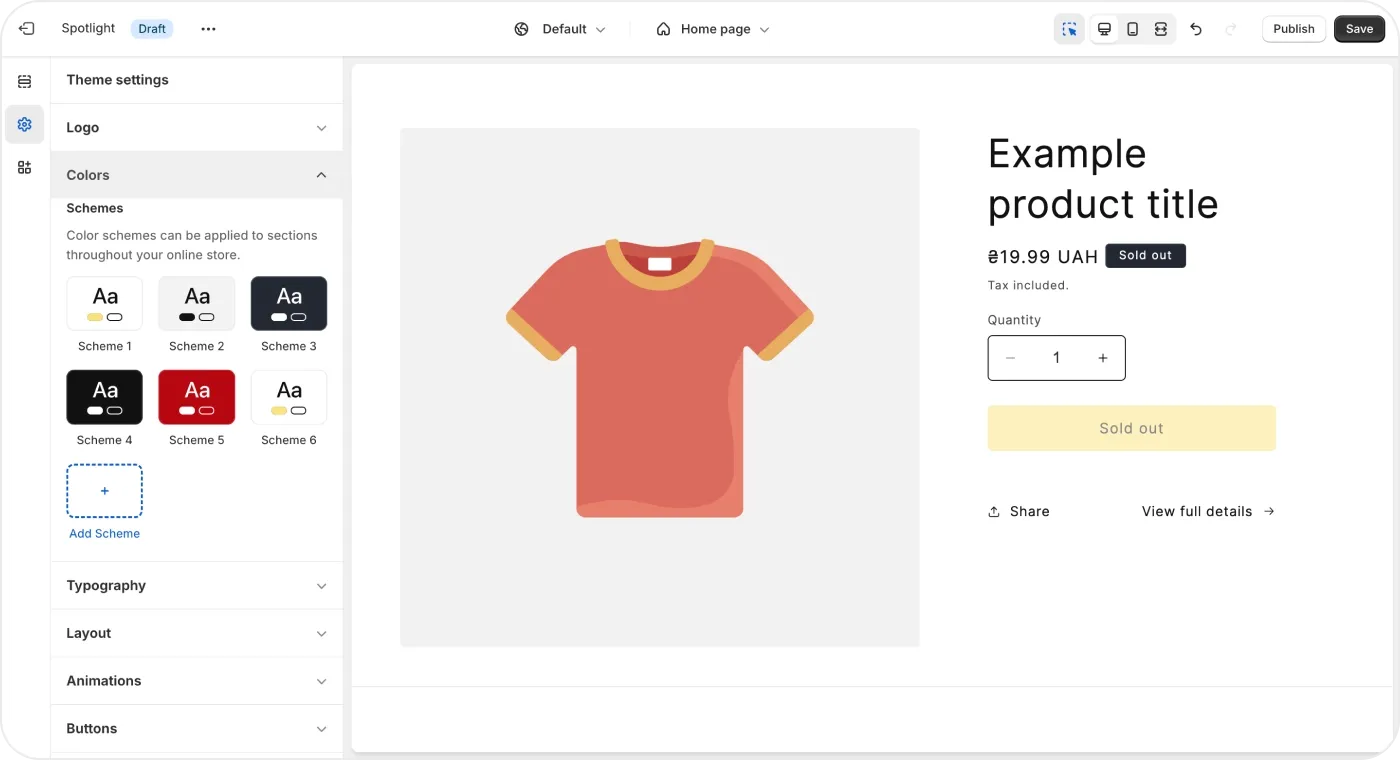
How to customize Shopify store to match your brand’s mood and values? Start making the theme yours by adjusting colors, fonts, and images. Manifesting your visual identity is the first step to becoming recognizable.
Useful font and color tips
If you have a color scheme, align your Shopify theme with the guidelines. If not, use the colors from your logo. If it doesn’t look interesting enough, select a color palette that matches your brand’s mood.
Think about the nature of your product. For example, if you specialize in wood furniture or leather goods, earthy tones like brown, beige, and orange could work perfectly. If such associations aren’t easy, seek inspiration from online color palette tools. Go to Color Hunt or Pinterest. Look for examples online.
After you select the colors, find and save their hex codes for future use. These are the combination of six letters and numbers. For instance, #FFFFFF represents white. #000000 represents black. Insert these codes in the corresponding fields during theme setup and use them in other materials. Remember to choose colors with sufficient contrast. It is essential to account for the basic accessibility.
Typography is another core aspect of Shopify theme customization. Balance creativity with legibility, consistency, and clarity. It will help build and maintain a professional appearance.
Use two or three fonts that complement each other without becoming monotonous.
Choose font combinations within the same font family for a better aesthetic.
Use bold, regular, and italicized versions to differentiate headings and content.
Establish a visual hierarchy using different typefaces (serif, sans-serif, script, and monospace).
Vary font sizes to emphasize content importance and aid navigation.
Finalize your color palette and font choices in the guidelines. Add brief reasoning on why you’ve selected each of them. Write the rules on using fonts and colors. It is crucial to be consistent to become recognizable. The guidelines will help you do it.
Adding images to your online store

You’ll need images for product pages that illustrate the items you sell. You’ll also need photos or graphics for other website pages. It’s best to involve photographers and designers to help you customize Shopify website. If you don’t have such an opportunity, do your best to select the imagery. Pick what matches you in style, mood, and palette.
Also:
Use only high-quality product images – well-lit and on a consistent background.
Stick to uniformity in color tones, lighting, and composition throughout your store.
Showcase product with multiple photos, including zooming and different angles.
Display products in real-life settings to create a connection with the shoppers.
Optimize file size for fast loading – compress before saving theme changes.
Include descriptive alt text for each image to improve accessibility and visibility.
Use galleries for product collections or featured items.
Ensure consistency across devices, desktop and mobile.
Update main visuals to reflect new products or seasonal changes.
Following these recommendations will make the imagery well-organized and visually appealing and help increase sales. The right visuals boost user confidence in their purchasing decisions.
Adding personality: customizing buttons and icons
You’re past the design setup and can now move to the marketing part. So, let’s talk a bit about calls to action (CTA), namely buttons and additional items.
Writing button texts that work
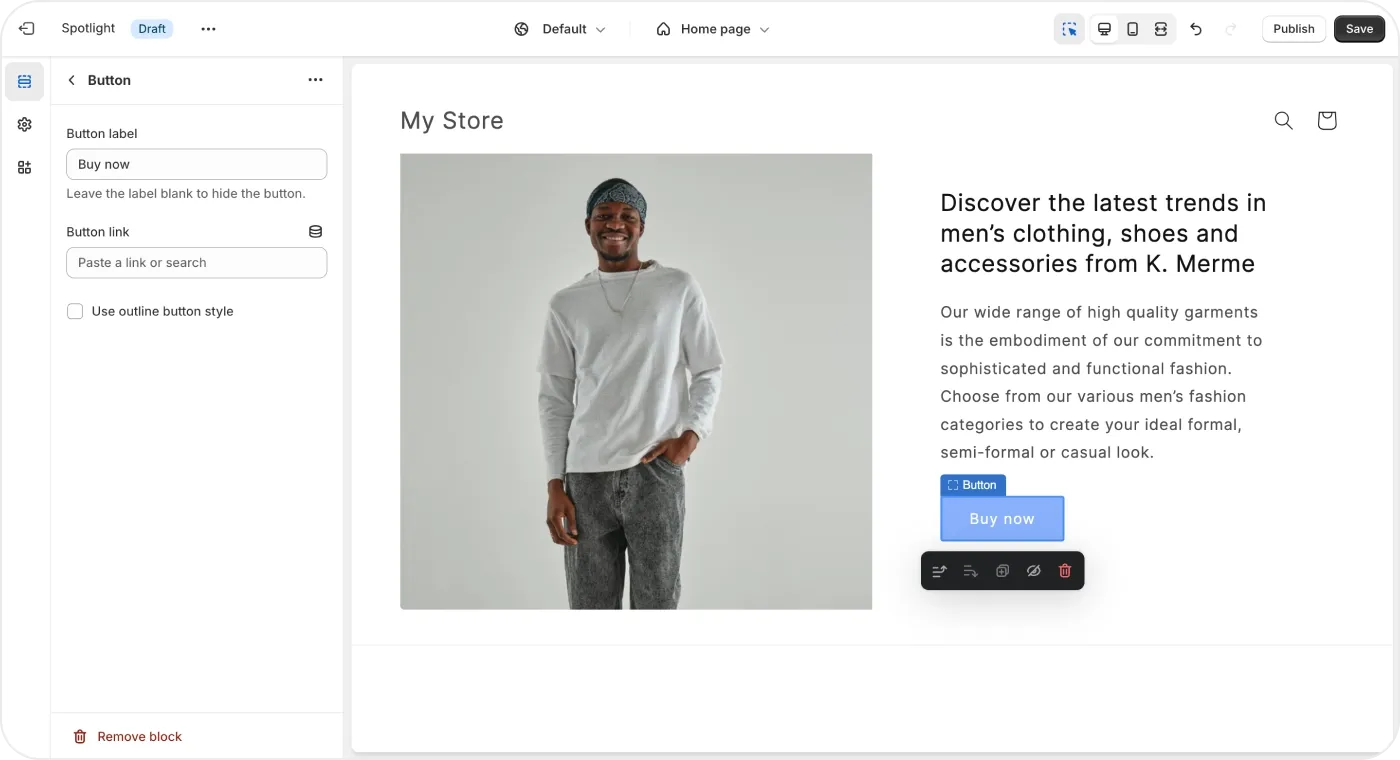
Creating buttons that drive attention is critical. There’s no way to tell for sure what will drive conversion. What’s left to do is use smart color and copy tricks to push a user toward clicking. There are several ways to encourage making a purchasing decision.
Choose colors that contrast with your overall theme. They will catch the eye.
Make buttons large enough to click easily. Put them where users tend to focus.
Use actionable language. Encourage a specific action – “Buy now,” “Order Today.”
Maintain whitespace around buttons. It will enhance the visual focus on the CTA.
Add a slight color change or animation when users hover over the button.
Experiment with button shapes and borders – round, square, bold, etc.
Remain consistent. The button design should align with the brand aesthetic.
If you aren’t sure what CTA will work best, it’s not a problem. Try using several versions. Conduct A/B testing for button variations. Use different colors, copy, and styles. Learn what resonates best with your audience for making design decisions easier in the future.
Adding custom icons for better personalization
One more thing that allows adding a unique touch is custom icons. You can search for badges using one of many great Shopify apps for verification badges. Or you can design your icons for verification, product descriptions, etc. There are only a few simple rules to keep in mind:
Opt for simple yet distinctive designs that align with your brand aesthetic.
Use an SVG format. It scales well and adapts to different screen sizes.
Ensure icons have clear and purposeful functions.
Link icons to specific actions whenever relevant.
You can upload custom icons to your theme assets or insert them using HTML code. Again, align them with your visual style. Test several versions if you want. Update icons along with the product and store information. If there are changes, even the tiniest elements should reflect them.
Liquid markup for advanced Shopify customization
Now you know how to customize Shopify theme without coding. But what if it’s not enough? Then, it’s time to use Liquid markup. Liquid is an open-source template language. It is written in Ruby for Shopify, but other web apps use it nowadays. Liquid is the backbone of Shopify themes. The platform uses it to load dynamic content on storefronts. If you need professional help in implementation, try Shopify customization services.
Design modifications with Liquid templating language
Shopify shares detailed guidelines on Liquid. Your development team can start customization from here. Or you can consider contacting an outsourcing company that specializes in Shopify development.
There are a bunch of things you may enjoy about Liquid as a brand owner.
Dynamic branding. You can adjust branding elements to ensure relevance and consistency. For example, wear a Santa Claus hat on a logo in December.
Better UI/UX. It’s possible to customize everything within the theme – layouts, content, interactions, etc. And a sleek UI/UX design increases visibility and engagement.
Convenient development. Liquid doesn’t call for any extra tools. The language is integral to Shopify and already offers all you need. There is comprehensive documentation and mechanisms for easy debugging.
Design adaptability. Liquid accounts for the responsive design. It suits well for data-driven personalization. You can adapt content for various users and devices.
Long story short, Liquid is a mechanism for tailoring Shopify stores to specific needs. It helps create a unique brand experience where standard, no-code customization isn’t suitable. Mastering Liquid templating opens new business opportunities. You can create a highly customized and dynamic online storefront that aligns precisely with your brand vision.
Examples of using Liquid for dynamic content
Let’s move from “why?” to “how to edit my Shopify store?” Think about what dynamic content you’d like to have. Maybe you’d like to display personalized information based on specific conditions. Or perhaps you want to show different prices for different product colors or other parameters. Setting up the conditions using Liquid will enable this.
The markup also helps to set up list logic. For example, if you plan to show collections or similar items on specific pages, insert this into the store’s logic for easier management. The same goes for filters. You can set up them using the templating language to make searching more flexible and precise.
And, of course, you can customize page structures by adding changes through Liquid code. Sometimes, some nuances affect the structure and layout a lot. If it’s impossible to adjust the little details with the no-code interface, adding some code will help.
These aren’t all features and benefits. Liquid templating language allows setting up personalized greetings, displaying date-based content, offering user-specific discounts, displaying images dynamically, and more. It makes sense to dive deep into its capabilities. They will help to unlock the full potential of customizations.
Customer experience: navigation and menus
You start to customize Shopify theme through visual design, but it isn’t only about the looks. Customization also entails the e-commerce website’s structure. Besides page blocks, you can set up navigation and customize menus.
Simplifying navigation for a user-friendly experience
Customers should be able to discover store content easily. You can facilitate this by adjusting store navigation, search functionality, and filtering. All three help highlight the store’s content and make finding the desired items user-friendly. Here’s a list of adjustments to consider.
Customize the header’s name and categories.
Add dropdown menus to organize subcategories.
Use mega menus for an expansive product catalog.
Use a sticky navigation bar to keep the menu visible as users scroll.
Customize the footer with additional navigation links.
Place featured collections directly on the homepage.
Enable breadcrumb navigation to help users better orient.
To customize filtering, categorize all your items logically. Enable users to narrow down choices. Let them choose the available options based on categories, price ranges, product attributes, etc. It will reduce the time spent searching and increase loyalty toward your shop. Let users find products quickly. Display accurate results for their queries. Add predictive search suggestions. Think of showing similar items if what they’re looking for is missing.
Customizing menus to highlight products and categories
You already know that placing featured collections on the homepage is possible. Let’s learn more about how it works. There are a bunch of easy-to-apply techniques that can highlight your key products or categories.
- Adjusting menu order. Put target categories at the top or at the most visible spot.
- Adding custom links. Direct users to your preferred destinations: landing pages, unique offers, target categories, etc.
- Linking to collections. Let customers open specific collections from the menu or other blocks on the homepage.
- Exploit mega menus. Include images, promotional banners, or additional information within the dropdown.
- Linking to product pages. Let visitors open in-demand product pages from the homepage, skipping search and menu.
- Scheduled changes. Plan and automate adjustments to your menu structure based on your marketing calendar.
Shop owners are not limited in options for menu customization. There are a variety of simple actions that can boost your marketing efforts. They also help create a dynamic and user-friendly navigation experience. Eventually, you optimize the customer journey and subtly align it with your business goals.
If you are overwhelmed with this abundance of options or don’t know where to start, it’s okay. You can reach out to DigitalSuits to enhance navigation structures and optimize menu layouts. The improved user experience is included in Shopify website development services.
Responsive design: looks great on any device
Another advantage of Shopify website customization is the ability to adjust content to various screens. All Shopify themes are mobile-friendly. However, if you decide to customize anything discussed above, you’ll still need to double-check it on various screens.
Reasons to pay attention to responsiveness
A large number of people shop on their mobile devices. A responsive design guarantees your website looks good and works well on various phones and tablets. Don’t forget that shoppers might have very different gadgets. It’s essential to let them have the exact positive experience.
So, a responsive layout adjusts to different screen sizes. The navigation remains convenient, just as planned. Buttons are easy to tap. Texts are readable without zooming. Customers easily find what they want and complete purchases in mobile-friendly online stores. It also encourages them to explore and buy more.
Moreover, Google pays attention to mobile-friendliness. Responsive websites rank higher in search results. It means more people can find your store when they search online. Staying competitive and visible becomes less challenging.
How to ensure mobile responsiveness
Check your online store for responsiveness after any changes. The tips below will help you ensure it looks and works well on phones and tablets.
Test on real devices. Check your Shopify store on actual phones to get more accurate feedback.
Optimize images. Use compressed images for fast loading on mobile devices.
Simplify navigation. Modify the site’s menu for easy navigation on smaller screens.
Set large tap targets. Make buttons and links big enough to tap easily.
Choose readable fonts. Use fonts that are easy to read on small screens.
Use short forms. Typing on a phone can be annoying, so only ask for essential information.
Minimize pop-ups. Avoid too many pop-ups on mobile. They are often intrusive.
Finally, test your store on different browsers. Software defects can be local and occur only in a specific browser or its version. These tips will help you guarantee a fantastic look and performance on phones and tablets.
Engage your audience: social media integration
One more thing to pay attention to when learning how to customize Shopify store: socials. There’s no need to explain why social presence matters for businesses. Let’s move straight to integrating social media into your Shopify storefront.
Integrating social media into the theme
Simplify the logging process by adding a social login. Allow users to sign in using Google, Facebook, etc. Add social media icons in the header or footer where they are visible. Integrate social media feeds – into the homepage, for example. Showcase your latest posts and encourage visitors to explore your socials. You can also display customer reviews from social media directly on product pages. It’s a great way to build trust.
Don’t forget to add share buttons on product pages. It will facilitate easy posting to social networks, messengers, etc. Also, add Pinterest integration for product pins. It lets users save your products to their boards.
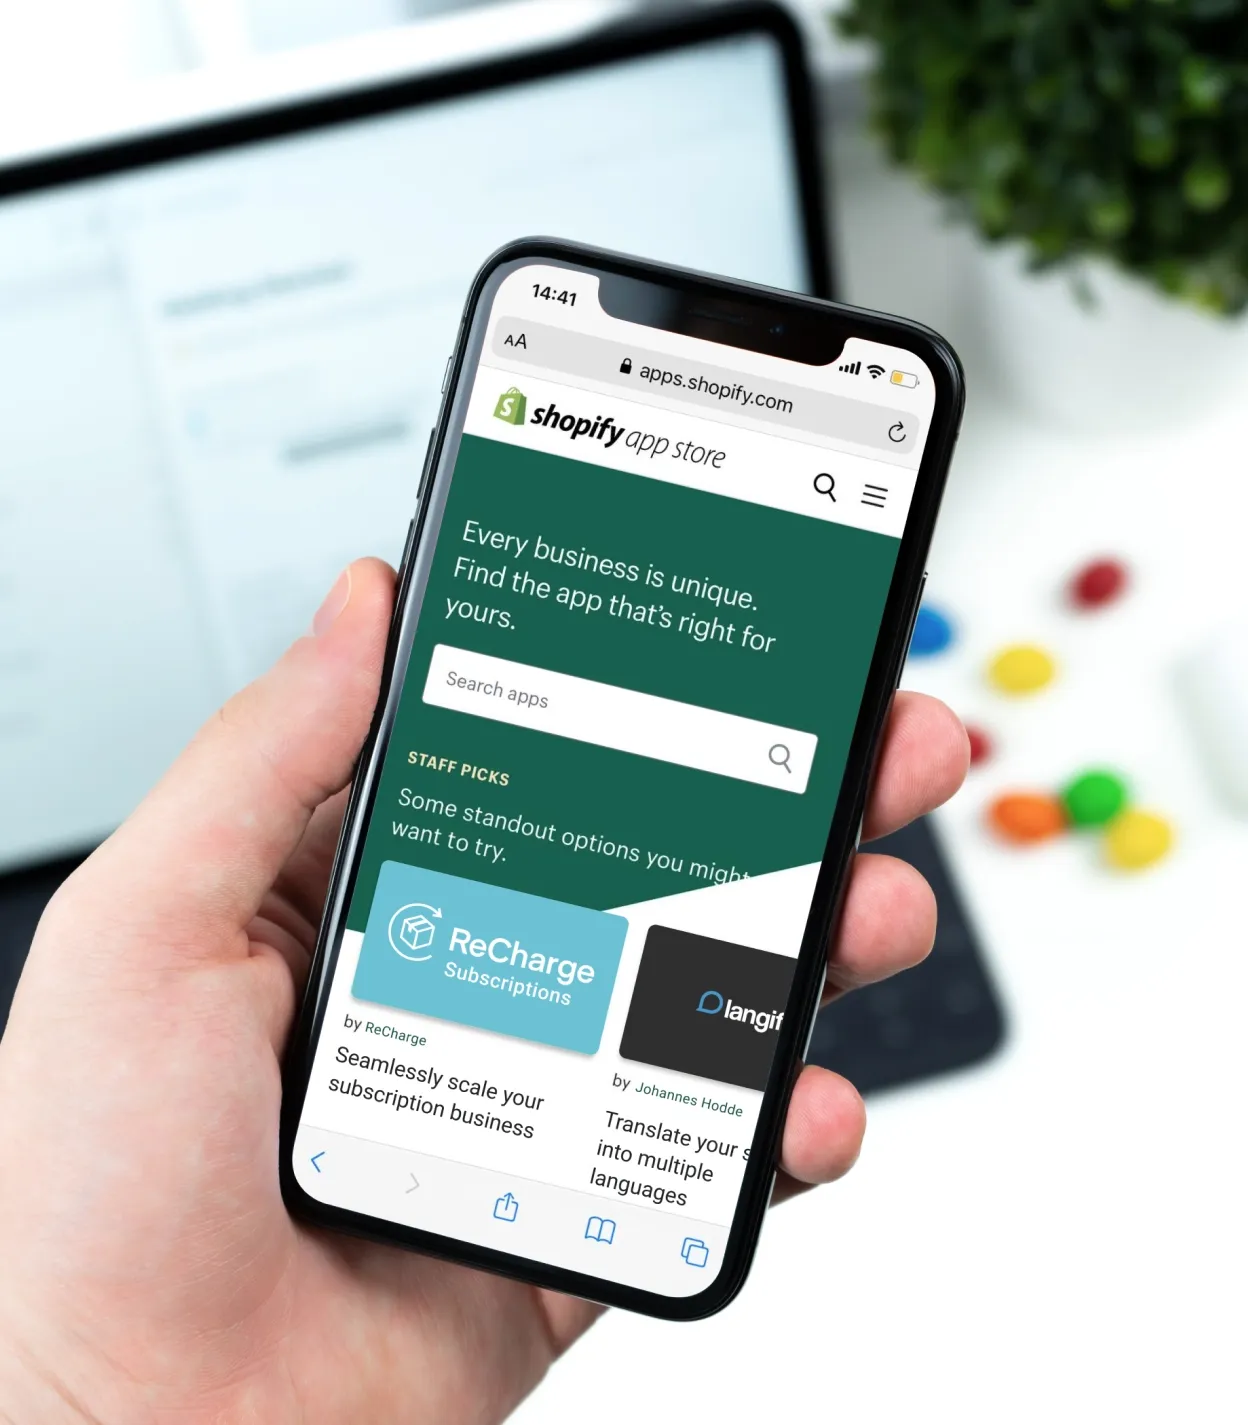
With this in mind, you can create an engaging online presence. There are also many applications in the Shopify App Store that extend these opportunities. You can find solutions specifically designed to enhance functionality through social media integration. For example, if the theme doesn’t allow displaying a social feed, a bunch of apps will help you set it up.
Encouraging social sharing and interaction
Incorporating visible share buttons on product pages can be helpful, but don’t limit your strategy only to it. Customers don’t frequently share products they like or buy on their social media accounts. Think of some other word-of-mouth promotion strategies. There are a few ideas that can work well:
Offer bonuses. Come up with discounts and exclusive deals for customers who share their purchases on social media.
Interact with user-generated content. Motivate customers to share photos or reviews with a dedicated hashtag.
Launch contests or giveaways. Organize events like these to encourage sharing your brand with users' followers.
Engage with comments. Respond promptly and engagingly to comments and messages on your social media.
Set limited-time promotions. Create urgency that customers will be eager to share.
Develop content that is shareable, entertaining, or informative. It will encourage organic sharing. Also, place clear and visible CTA buttons to keep the sharing function at the top of customer’s minds. And pay attention to your audience. Communicating with them will help build the reputation of an outgoing and reliable brand. You’ll create a connected and engaged customer community.
To sum up
What does Shopify store customization change for your business? Let’s be honest: it’s not a panacea. A well-designed theme alone cannot be the factor that makes your online shop successful. Nevertheless, it plays a significant role in making it so – along with the assortment, features, performance, and customer support.
It’s wise to focus more on one thing at a time. Since it’s currently Shopify theme development for you, let’s wrap up our story with a cheat sheet – a brief guideline on customization. There are only seven steps to pass:
- Explore no-coding functionality for Shopify customization.
- Dress the website in your own fonts, colors, and images.
- Add personality by customizing little things, like icons and buttons.
- Use Liquid markup and code-based changes for more customization.
- Set up clear navigation and highlights in the menus.
- Make sure the design remains responsive after theme customization.
- Engage with your audience on social media to boost your visibility.
Don’t consider designing a customized theme for your Shopify store as a burden or a challenge. Experiment with your store’s look and feel. Don’t be afraid to be bold. Test different, even opposite, ideas. Simply have fun. And if you need someone to back you up during more advanced customization, don’t hesitate to contact DigitalSuits. We’ll work on tailored solutions that align with your business goals.










Was this helpful?
0
No comments yet